I see a lot of photos from photographers that always seem to have an orange tint across them or a soft bluish look. A lot of times it gets past off as a ‘warm feeling’ or a ‘cool feeling’ for the photo, but the colors are not true colors of the light and what has happened is the camera’s white balance has been left on auto and the photographer has not made any adjustments for the given light to bring out the true colors. I know there are times when this is exactly what you want but that is what post production is all about.
So let’s take a quick look at how to manually set your camera’s white balance. This will help you in almost all your photo situations.
One of the easiest ways to think about white balance is to remember that 5000k (k = kelvins) is the center, and if you move up from the center you get an orange tint. The higher you go the more orange (warmer) cast you get, and the lower from the center the more blue (cooler) cast you get over all the colors. Most cameras are preset to around 5600k and will naturally have a warmer (orange) tint in all shooting situations.
But setting the white balance on a DSLR camera is important to ensure accurate color representation in your photos. While there are various methods to set the white balance, here’s a straightforward and commonly used approach:
- Start with the camera in manual mode: Set your camera to manual mode (M) to have complete control over the settings.
- Choose a white balance preset: Most DSLR cameras offer white balance presets such as daylight, cloudy, shade, tungsten, fluorescent, flash, etc. Select a preset that matches the lighting conditions of your photo shoot location. For example, if you’re shooting outdoors in daylight, choose the daylight preset.
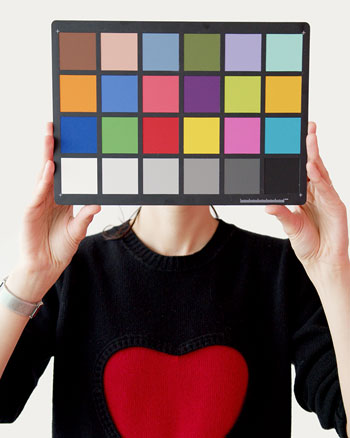
- Use a gray card or white object: If you want highly accurate white balance, you can use a gray card or a white object as a reference. Place the gray card or white object in the same lighting conditions as your subject, and then fill the frame with it.
- Set custom white balance: Go to your camera’s menu or settings and find the white balance settings. Look for the option to set a custom white balance. Follow the instructions provided by your camera manufacturer to set the custom white balance based on the gray card or white object.
- Verify and test: Take a test shot with the custom white balance setting and review it on your camera’s LCD screen or transfer it to a computer for a better view. Ensure that the colors look accurate and the white areas appear neutral without any color casts. Make adjustments as necessary.
- Shoot in RAW: If your camera supports shooting in RAW format, it is recommended to do so. RAW files contain more color information, providing greater flexibility for adjusting white balance during post-processing.
Remember, the specific steps may vary slightly depending on the make and model of your camera. Consult your camera’s manual for detailed instructions on setting the white balance for your particular device.
Be First to Comment