A little of my workflow:
How I take a photo like the one on the left and quickly retouch it to the one on the right

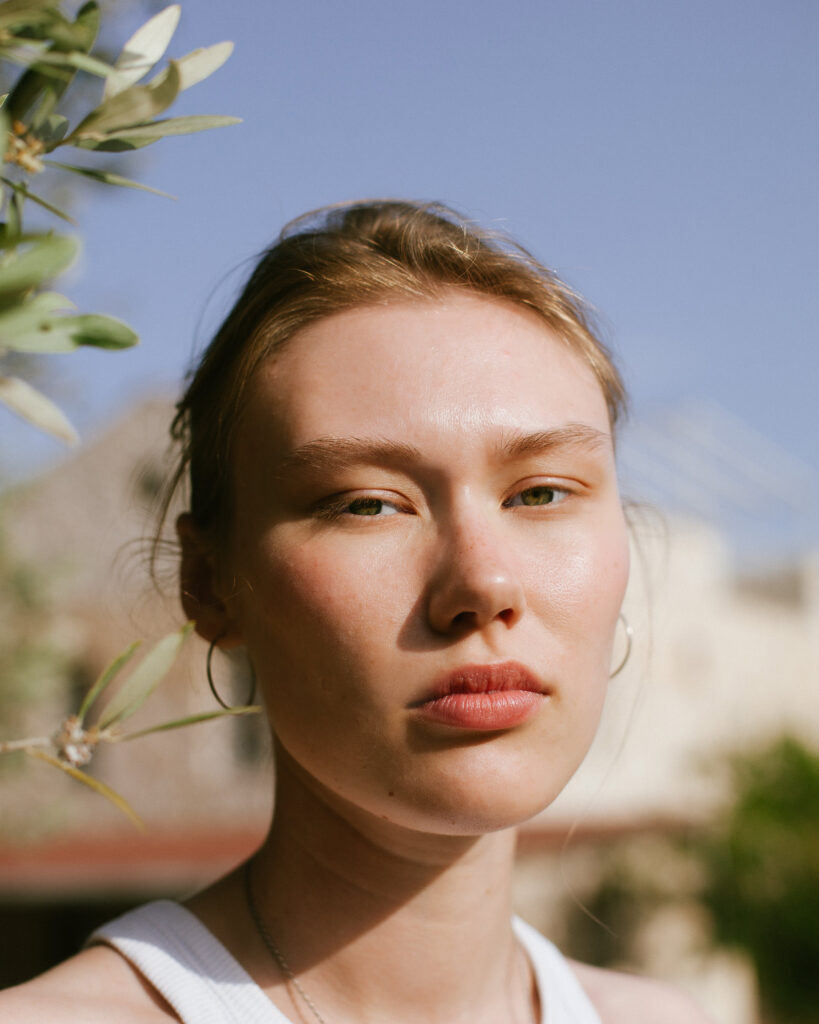
These photos came from Pexels courtesy of Polina Semerina. Pexels is a great resource for stock photos and is free. Adobe Photoshop offers a free plugin to help search the Pexels site and when you find a photo you want to use, with a click, photoshop will import it into your workflow.
Here’s a step-by-step guide to help you create a separation action that you can use repeatedly. By following these instructions you’ll be able to separate your image into layers for adjusting wrinkles, skin, fine details, shadows, and color. You can utilize tools like Dodge, Burn, Blur and Healing Brush for retouching once you’ve completed the steps.
These are the easiest steps I found from Adobe’s website:
Follow these steps to create a separation action. By using actions you will learn how to create separation and create an automation that can be reused. Once you complete these steps you will have a layer, for adjusting wrinkles, skin and other fine details as another layer for adjusting shadows and color. The Dodge, Burn, Blur and Healing Brush tools are all helpful for retouching after following these instructions.
- Get started;
Go to the Window menu and select Actions. In the sidebar that appears, click on Create New Action. Give your action a name. Select Record to start recording the separation process. - Layer it;
Open your image file and right click on the layer. Choose Duplicate Layer from the options that appear. Then unlock the background layer by clicking on its lock icon so that it can be modified. Rename the layer as “Skin+Texture” and the bottom layer, as “Shadows+Color.” - Group it;
Combine both layers into a group by selecting them both and going to Layer followed by Group Layers. - Apply filter;
Select the “Shadows+Color” layer and go to Filter followed by Blur Gaussian Blur option. Set the radius value to 5px. Click OK. - Apply it;
Choose the “Skin + Texture” layer and go to Image › Apply Image. From the Layer selection menu pick Shadows + Color. In the Blending menu Subtract. Adjust the Scale to 2. Set the Offset to 128. Finally click OK. - Blend it;
Within the Layers panel while having Skin + Texture selected choose Linear Light from the Blending modes menu. - Replay it;
Well done! You have successfully prepared your two layers for retouching. Simply click on the stop icon, in the Actions sidebar. This action will be saved for use. From now on all you need to do is open an image click on the action. You’ll be good to go.
You can see here, I had to increase the radius for this photo to 10.8 during the Gaussian Blur
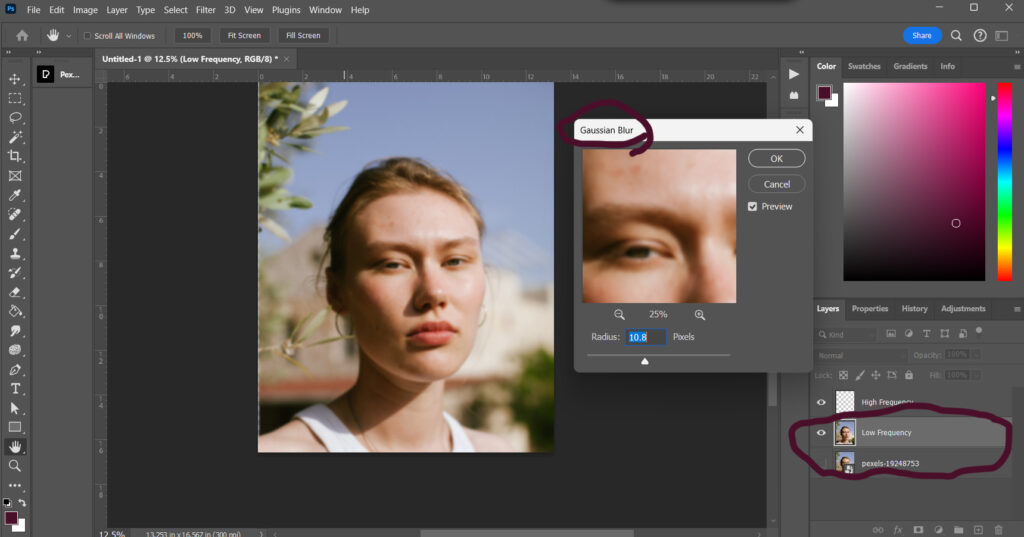
One thing I learned is when I am working on skin blemishes(High) or Color(low) I always add a layer just above the low or High frequency rather than directly on the low or high layers. That way if I don’t like the results I’m getting I can delete the layer and start again with a new layer.
Many good and not-so-good videos on YouTube explain the process of frequency separation and if you looking for some I would check out the “piximperfect” channel. It’s a top-rated channel all about Photoshop.
Be First to Comment